Thursday, July 30, 2015

Building a Better FPV Video Rig

A while back, I glued a small FPV camera to a Boscam 10mw transmitter.  It worked.  It worked great!  On a single lipo.  This.. becomes an important note.  

If you want to take a look at my previous micro FPV rig, click here: http://realtinker.blogspot.com/2015/03/playing-with-fpv-stuff.html

Fathers day rolls around, and I bring my FPV gear to Michigan, to show it off to my Dad.  I plug that pretty looking JST plug, into my balance plug to JST adapter, and a whiff of white smoke comes out of the camera.  I had forgotten that my 10mw transmitter was 3.3v only.  I, in my infinite wisdom, had just fed the poor little thing 12.6v from a fully charged 3s 2200.  Whoops.

I'm a bit of a parts hoarder, so I did some digging through drawers, and came up with this little pile of parts.


Here we have the camera, a JST plug, a dip switch pack, some pin headers, some veroboard, the new 50mw transmitter, the burnt out old 10mw transmitter, and most importantly a 7805 5volt voltage regulator.

Why 5v, instead of 3.3v?  Well the 50mw transmitter uses 5v instead of 3.3.

First, I need something to work on, so I cut off a bit of veroboard.


And I started the test fitting process.  If you have the stuff on hand, always do test fits.  And do them often!


If you put a circuit board on the handle of pliars, it gets the pins out of the way, so componets will sit flat.  Here I am working out the distance between the pin headers, to see if I can mount the 7805 under the video transmitter.


Something my last camera didn't have, was a way to change channels.  This one, does!  Sadly, the cost is about 9 grams.  The whole previous rig was 9 grams, in the end, this one ends up being 17.4g.


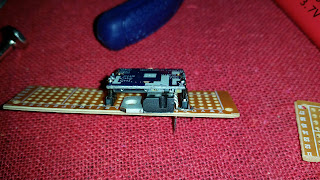
Here's the 7805 under the VTX module.  It's a tight fit, but seems just fine in there.


And then I started soldering.  


Did anyone ever tell you how hard it is to stop, and take pictures between steps of a tutorial?  It's really very hard to remember.  Because my next shot was this:


That's the completed transmitter and camera module, with all of the protective hot snot in place.


At least it works, right?


 The antenna is just a bit of un-shielded wire.  It's cut exactly the right length for 5.8gHz.  I have some RPSMA jacks coming from surveilzone that should show up in a week or two.  Once those come in, I"ll swap this over to circular polarization.

That said, the rig works, and has decent range.  I'll try to get some real numbers on range later.

Thanks!  If there's enough demand.. I could probably clean the design up, and maybe do something silly like get a board done by oshpark or something.

Monday, July 27, 2015

The first Davis DA-2.

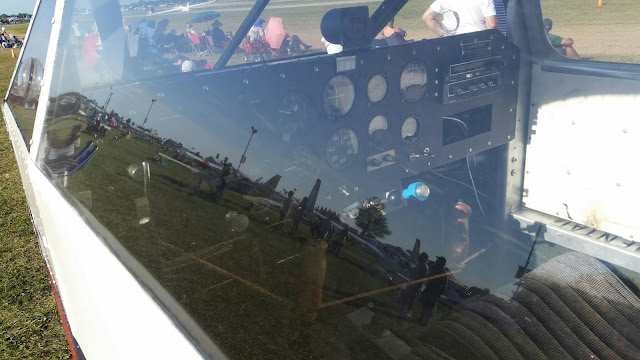
That, is a Davis DA-2.  Well... importantly it's the first Davis DA-2.  Some nice people flew it to oshkosh this year.  Sadly I didn't get in touch with them soon enough, so I didn't get a personal tour of it.  It was nice to get to see the original, and see how Leeon did it the first time around.  

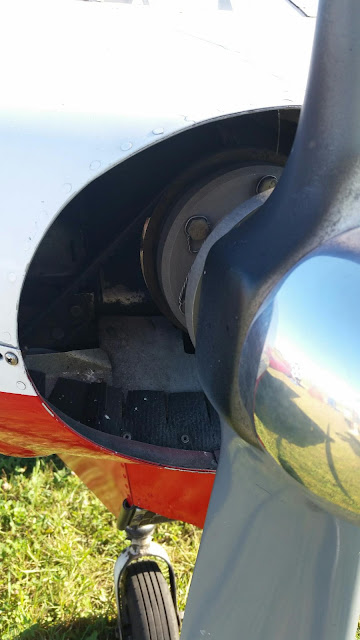
My interest in the DA-2 is somewhat more than in passing, so I took a lot of pictures.  And with permission, from Giff, who's half owner, here's what I took.  He does call her Ugly Betty, so any of the rough edges.. well I assume he's aware of.  


Wednesday, July 22, 2015

Playing with my [gim]balls.

One of my goals is to have a "small" camera platform.  Part of getting there, is to have a gimbal to keep the camera steady, and aimed.  That means gimbals. 

In my latest order, I grabbed two cheap gimbals. 

This one is one desgined for the mobius.  It uses two 9 gram servos, and is really quite confidence inspring. 

I expect it'll do everything one can expect of a 2 axis gimbal.  I assembled it using some thing CA.  It went together fairly easily.  The only trouble spot was the servo arm on the bottom of the gimbal.  That is now just glued in place, no screws.   For about $10, it's a heck of a deal.

I also picked up a GoPro sized gimbal.  (in spite of owning zero gopros..)  It too is a two axis rig.  It uses a 9 gram servo to do the pitch, and a full size servo to handle roll.  
 
 It looks pretty good.  However I think the servo I had for the roll is just crap.  It had a lot of slop in it, so the whole gimbal has a bunch of slack and wiggle in it. 
 
Further reviews will come later, as I fly them.   

Tuesday, July 21, 2015

Nano CPX upgrades

Ah, the Blade Nano CPX.  This thing is a wiley little bugger.  It's so light that it really doesn't want to hover.  It also is massively affected by room air currents.   


And yet.. I still love to fly it.  At least, when I can fly it. I made a mistake.  I decided to upgrade it, in hopes of getting better flight time.  Brushless motors are more efficient, and I thought I could help my desire to fly longer by installing the Horizon Hobby Brushless upgrade kit. 

....  I was wrong.... 

First off, lets talk about the installation.  The manual for installation doesn't go into great detail.  It shouldn't have to, as, at least in theory, the install is easy.  You unplug the stock brushed motor, and slide it out of the airframe.  You slide in the brushless motor, tape the ESC to the 5in1 board.  Next you plug the orange wire into the 5in1, being sure to match the colored dot.  Finally, you plug the power harness into the stock battery plug. 

But that misses at least one important step.  The motor clocking matters.  When you install it, make sure the motor leads come out of the motor as close to the 5in1 board as you can. 

Now you'll notice that there's no accessory harness in this picture.  I have wired the ESC directly to the pads on the 5in1 board where the stock battery connector goes.  This is because that accessory harness ruins the helicopter.  

Allow me to explain.  The 5in1 board has a low voltage cutoff built into it.  To save those expensive little 150mah batteries that Horizon Hobby sells.  This, is a very good thing.  Now the difference between a "good" battery, and a "done" battery, is a few tenths of a volt.  The connectors they use for these batteries, are not exactly high current connectors, so are pretty poor as plugs go, resistance wise.  The wires they use to bring power to the 5in1 board, are also very light gauge. 

This means there's effectively a string of resistors between the battery, and the 5in1 board.  And between the 5in1 and the battery there's this ESC that's trying to suck all the power it can from that tiny little battery. 

Any time there was a big load on the motor, the helicopter shut down.  I tried a variety of batteries, attempting to keep the voltage up under load.  The 25c 150mah cells wouldn't even spin up the rotor.  The 45c cells would work, if it was one of my fresh 45c batteries.  I also tried an aftermarket Lectron Pro 180mah 35c cells, and that had the best results. 

However, even under the best conditions, I was getting less than two minutes of flight time.  And we're talking just gentle hovering. 

After some digging around, I found that people had some good results with bypassing the harness.  I really didn't want to make any permanent modifications to the Nano CPX, but I also wanted my $60 brushless kit to work.  So I cut off the harness.  And I soldered the power leads from the ESC to the most sane place I could think of.  
 
I also read, that some people are flyign the Nano CPX on the 250-300mah cells from the MCPx.  ... I'll be trying that as soon as I can get a harness to adapt the plugs.  I anticipate eight or ten minute flight times. 

In the same package as my brushless kit, I ordered some landing gear.  They look great, and have a tail support boom.  They very seriously make the whole helicopter more rigid.   However they're also significantly heavier than the stock gear, something like three times the weight. 
 

Well they look good off the Nano CPX.  They're not going back on there. 
 Now.. I need to tune the pitch and throttle curves.  And maybe learn to flip this thing.